Blog
Explore the latest insights from our experts
Dive into integration best practices, industry trends, strategies for digital transformation, and more.
Featured
Breaking barriers with AI: 5 trends that are changing the game


Announcing Celigo’s July release: Technical enhancements and new connectors

Mastering employee transitions: The power of HR automation
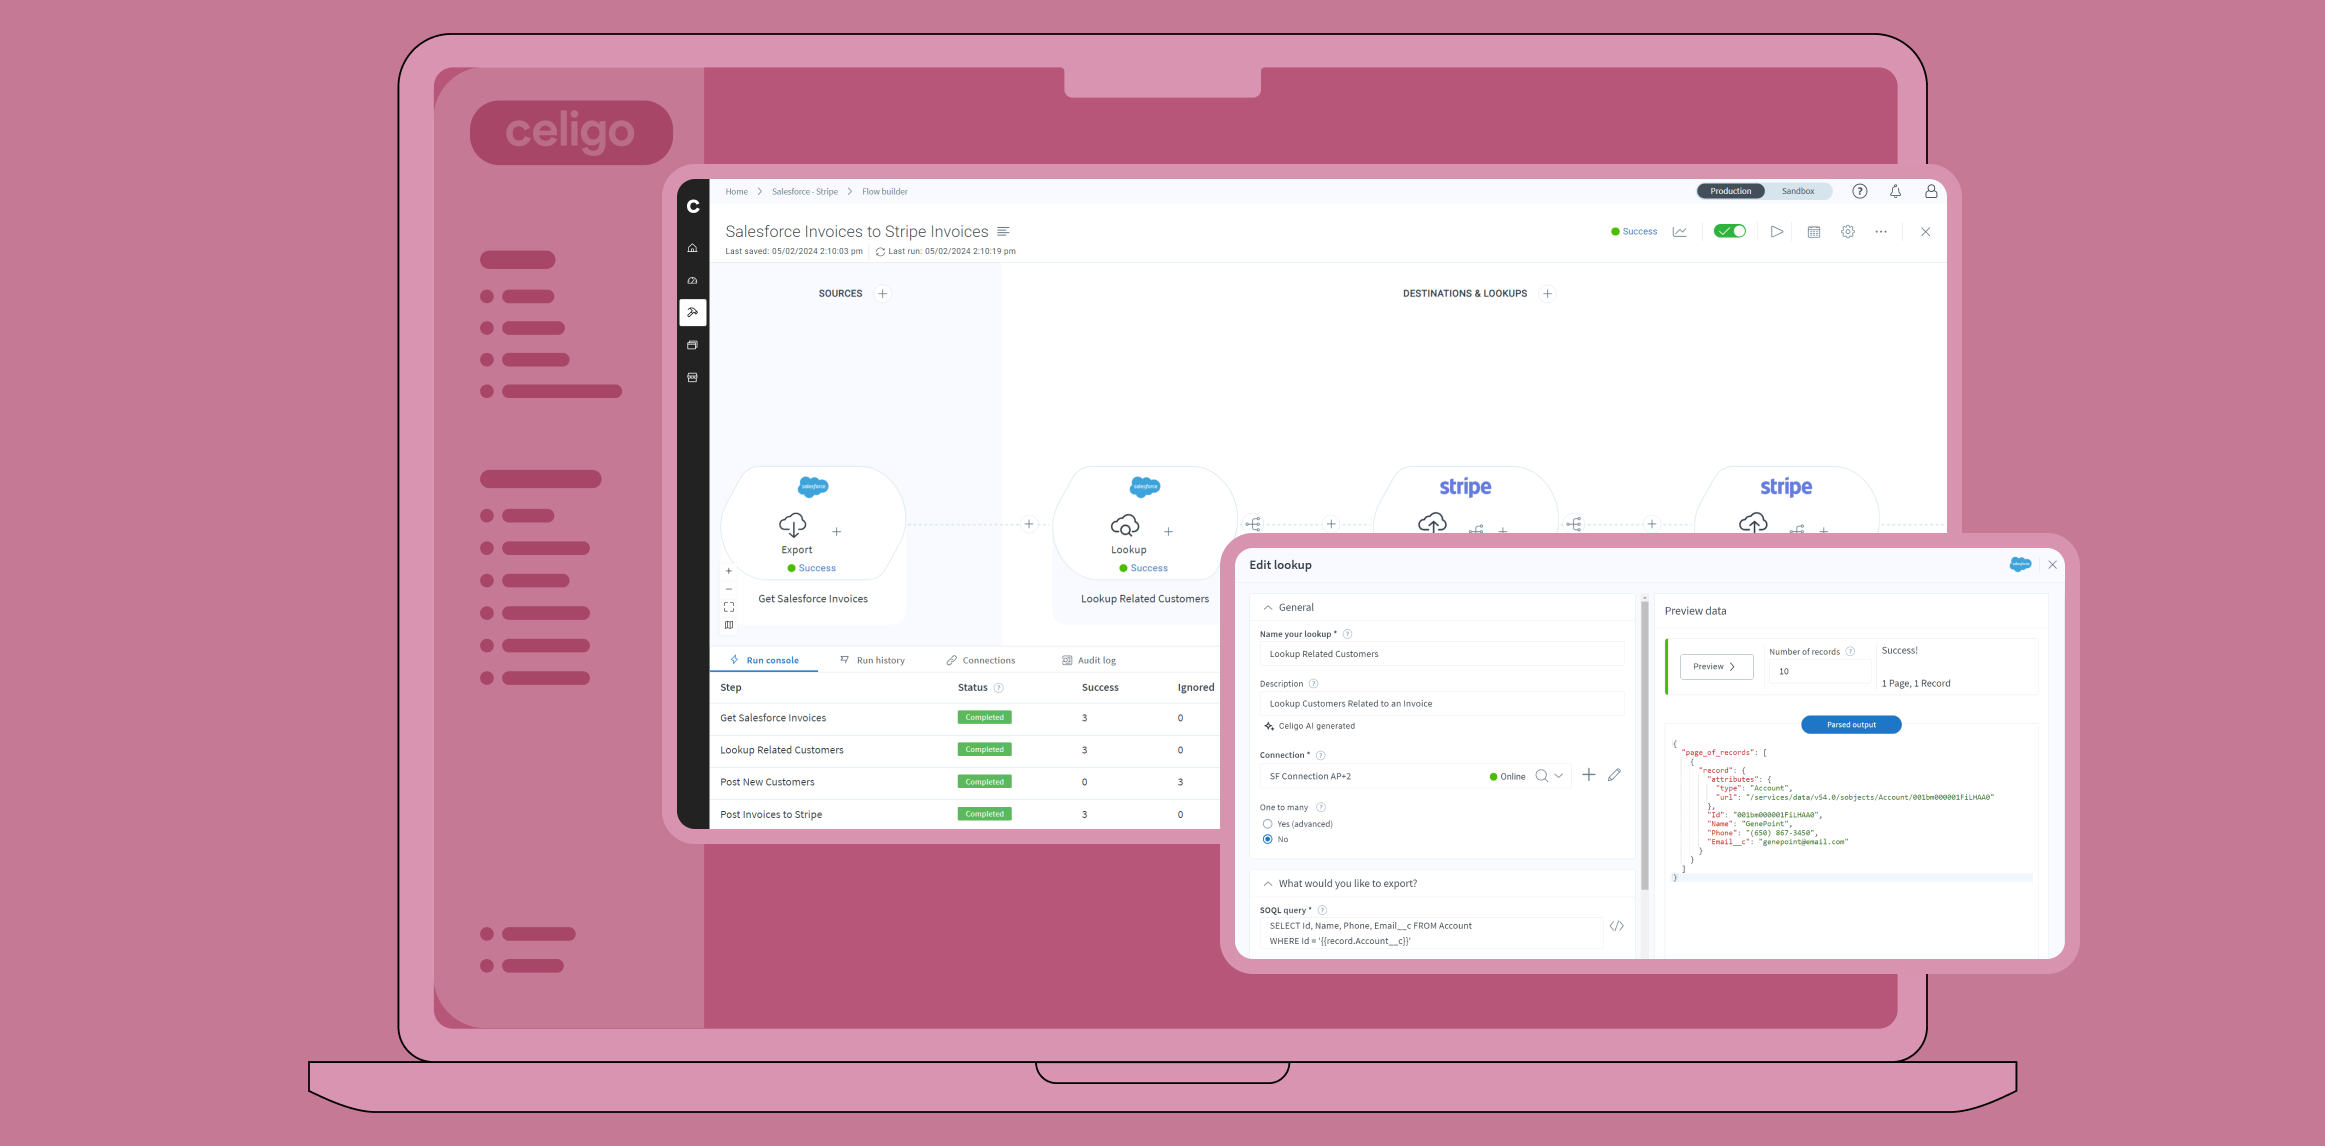
Lookup steps: A complete guide

Enhance your integrations with Integration Lifecycle Management

Crush conversion rates: Enhance your lead funnel with automation
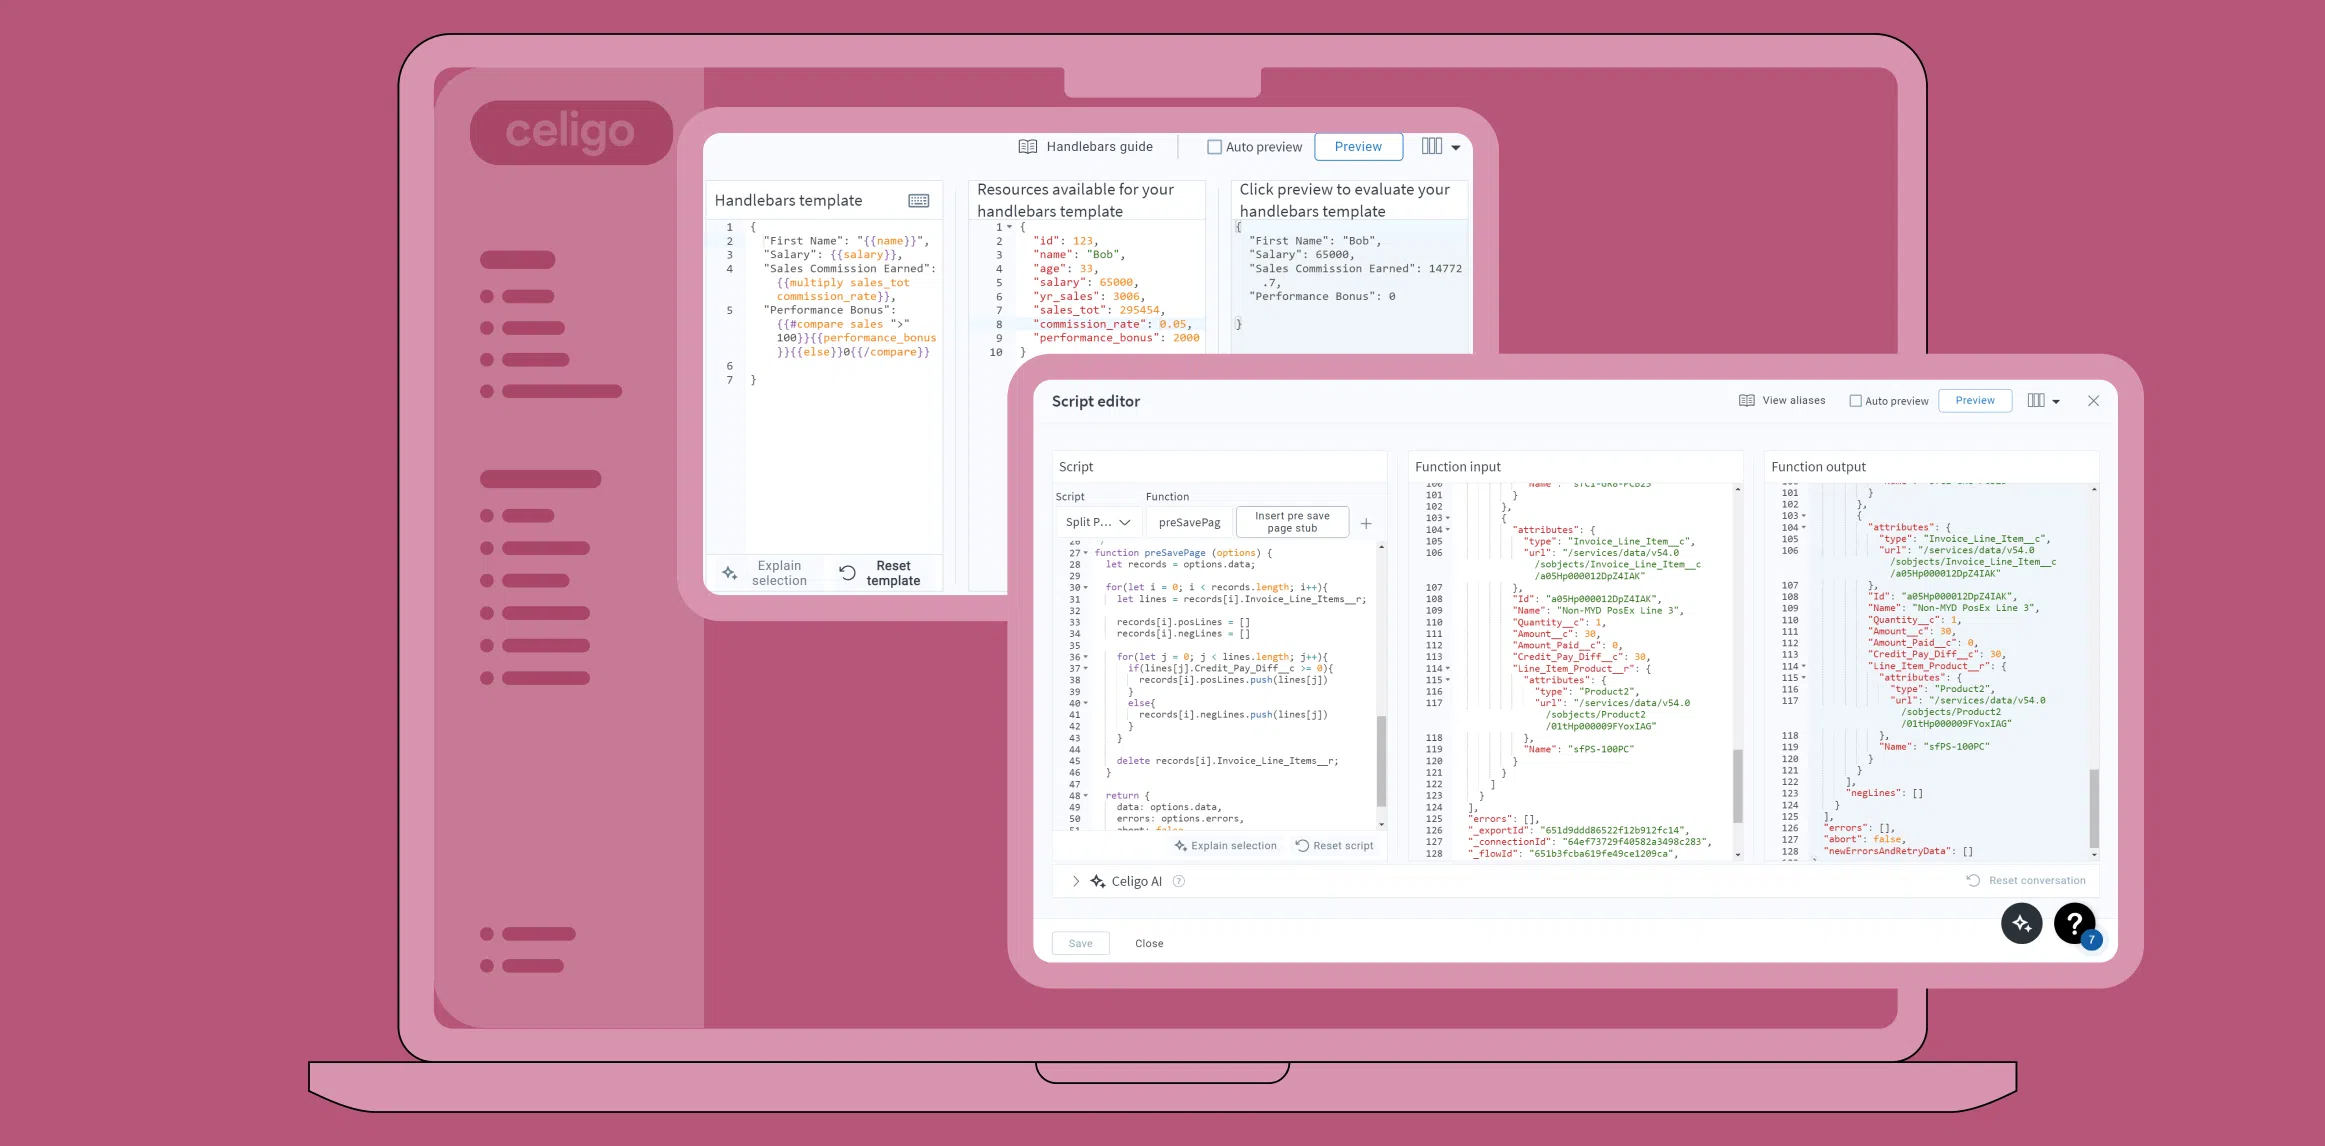
Handlebars and JavaScript hooks: Best practices
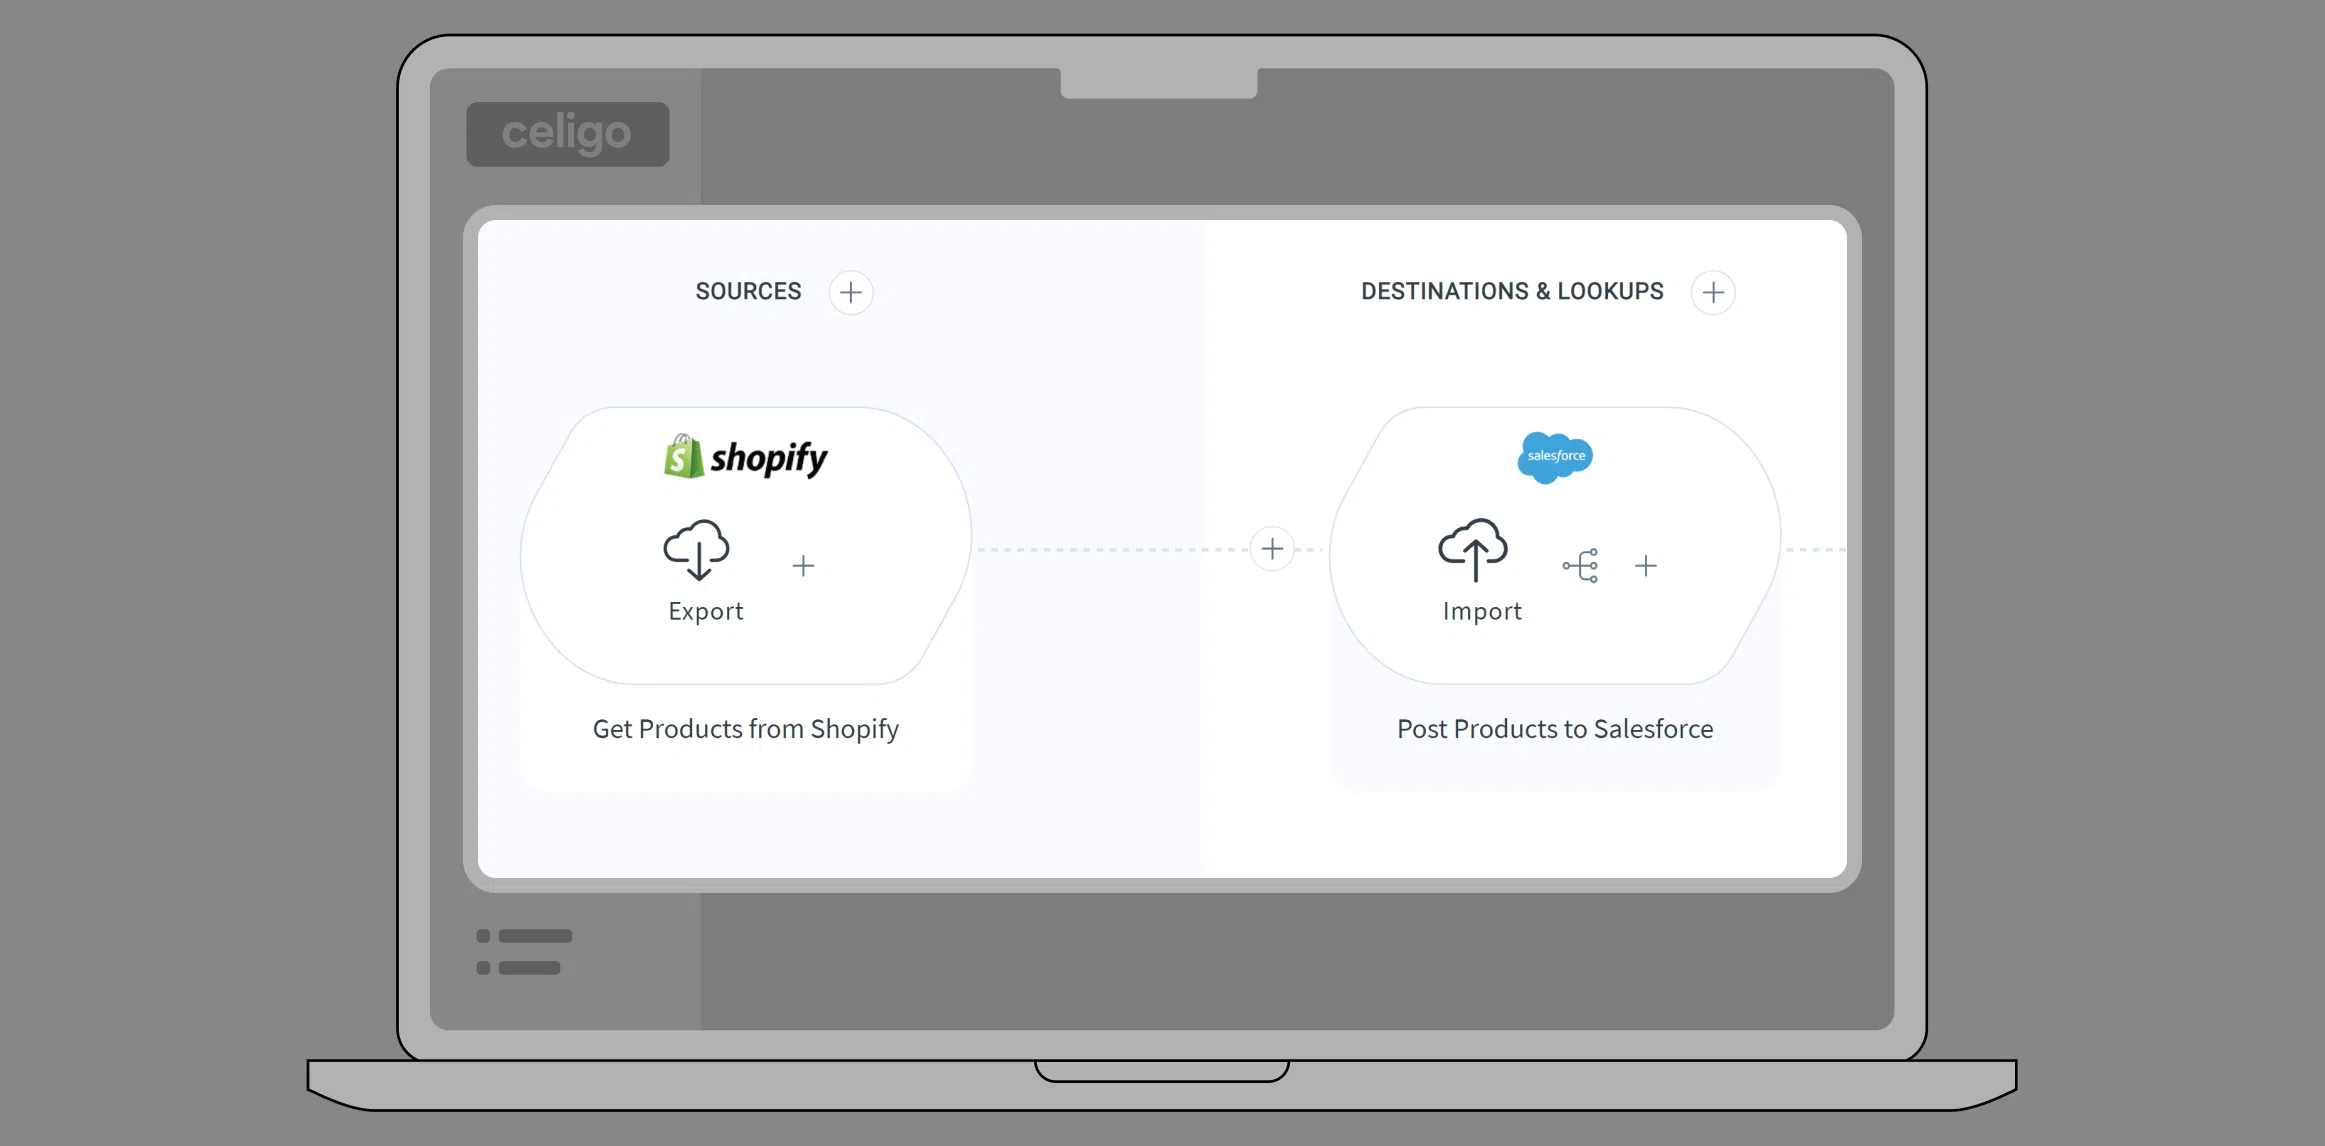
How to create your first flow
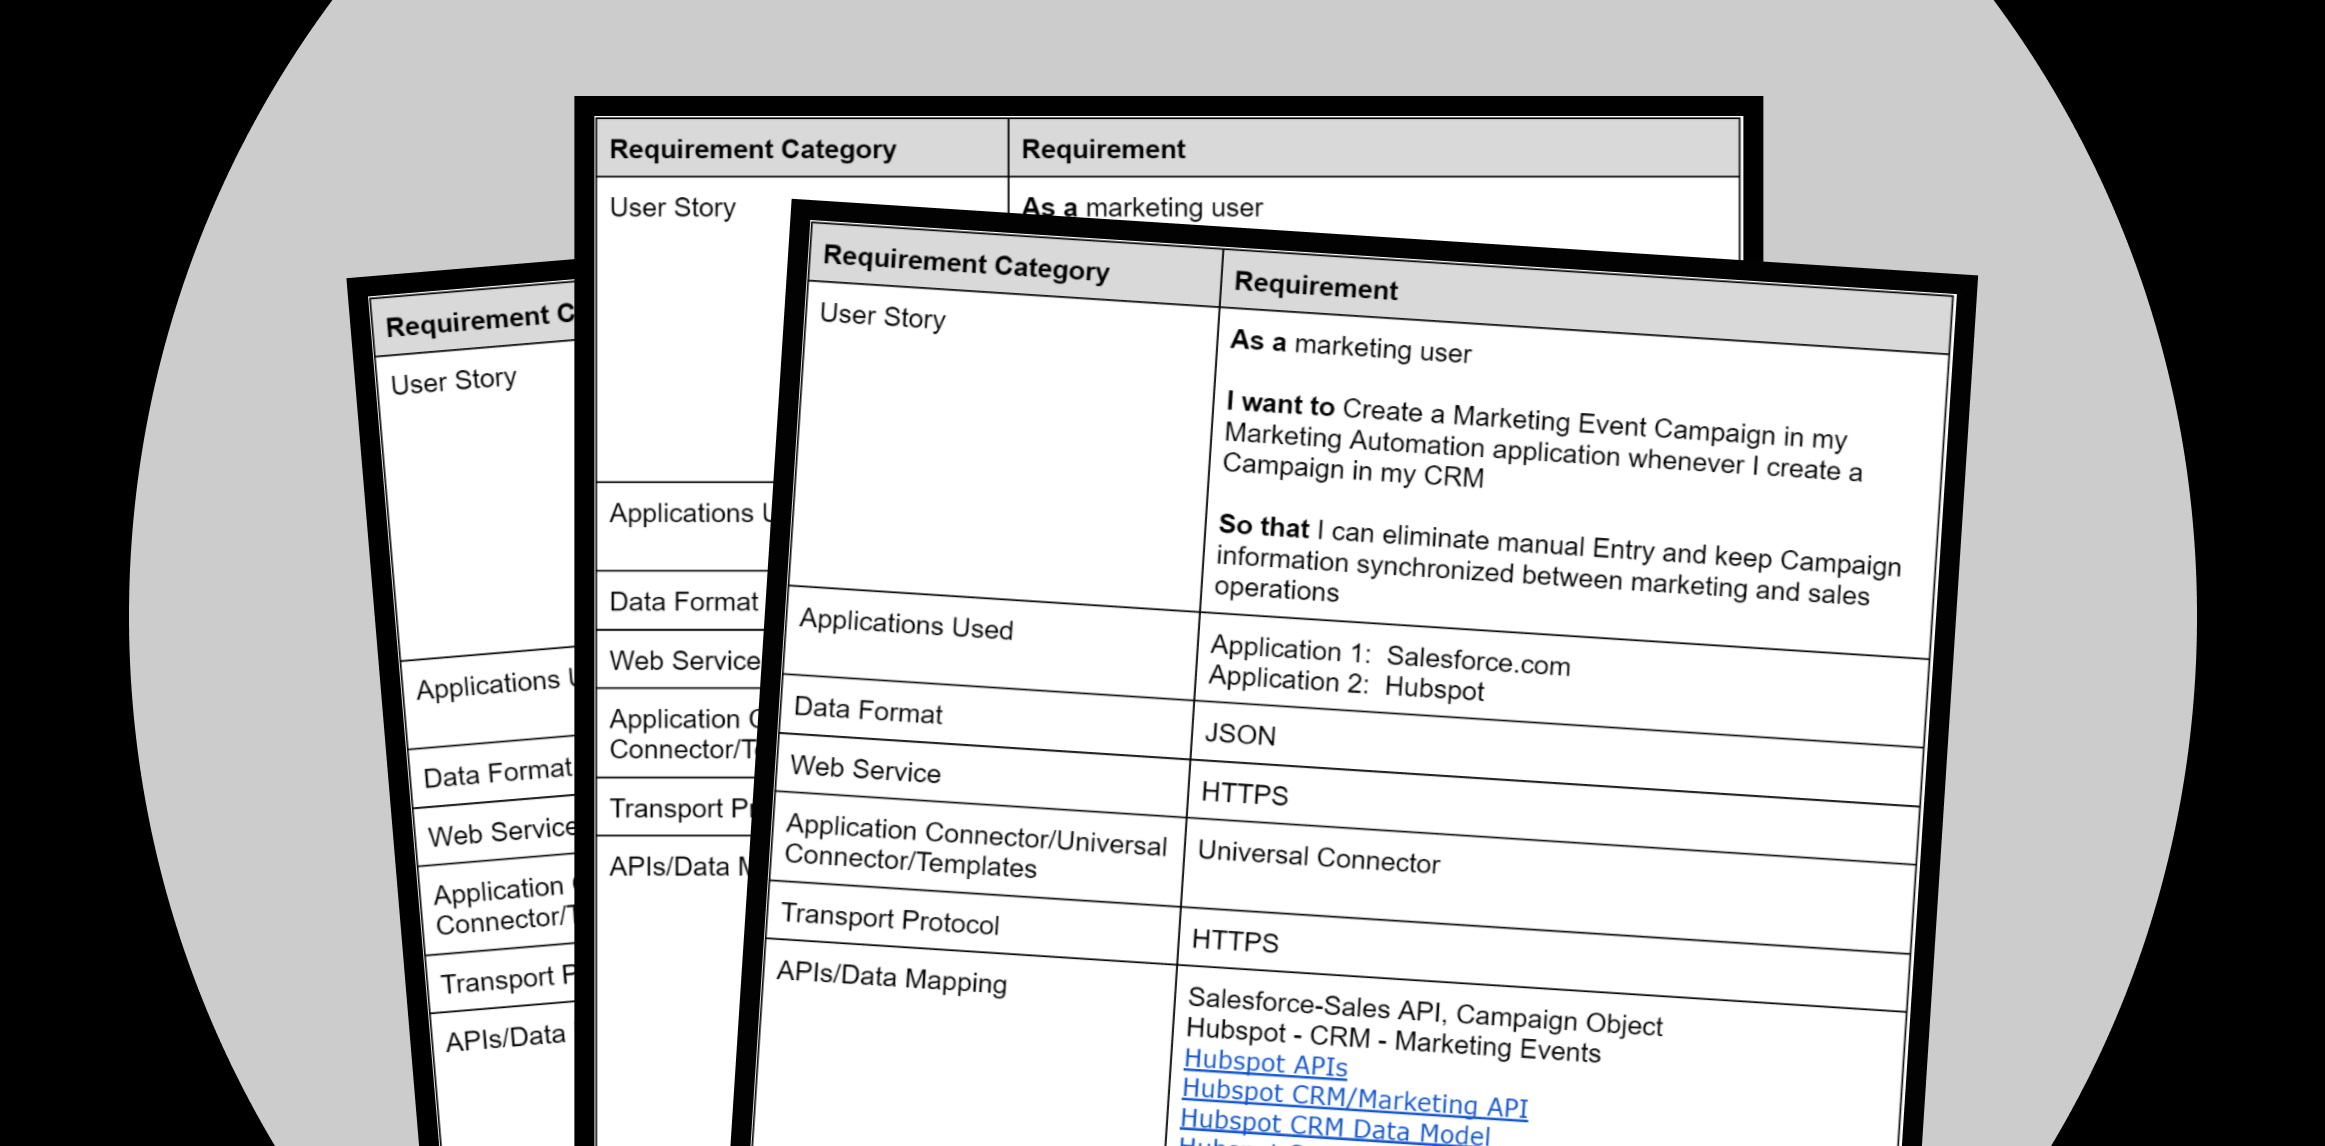
Flow building 101: Gathering integration requirements

How digital sales are shaping the future of B2B commerce
Elevate your integration game with “Integration bytes” weekly webinars

Why you need an iPaaS to build a RAG application
Integration tiles: Best practices

From weeks to 45 minutes: How QDOBA Mexican Eats accelerated automation

How the coffee and tea industry is brewing up success with automation

Empower your workforce with HR business process automation
How to automate lead engagement for optimal revenue growth