Marketplace automation: Creating WordPress drafts from Asana tasks
 Updated Feb 26, 2026

When information for web publication tasks lives in spreadsheets and project management tools, creating and maintaining website pages for a marketplace often requires repetitive copy-paste work, consistent attention to detail, and ongoing manual updates.
This manual work presents a clear bottleneck for web ops. As content volume increases, this process becomes difficult to scale and prone to errors.
Automating web operations by connecting project management tools to a web publication tool like WordPress allows teams to treat structured task data as a source of truth for content creation. When tasks include standardized fields for metadata, status, and assets, that information can be used to generate web pages dynamically—reducing manual effort while improving consistency and speed.
For Celigo’s Technical Product Marketing (TPM) team, this approach was used to address a growing web operations challenge, publishing connectors to the website’s Integration Marketplace.
The TPM team used Celigo’s intelligent automation platform internally to build an end-to-end process for publishing webpages.
This automation reduced the process time by over 99% and saves nearly 1,000 hours annually.
Asana tasks enriched with custom fields act as the blueprint for WordPress pages, allowing connector information to move from internal tracking to public availability without manual page creation.
Here is our step-by-step process:
- Jira → Asana: Automatically creating structured Asana tasks from Jira Connector Stories to keep development status and publication work in sync
- Asana → WordPress (this post): Using those Asana tasks to dynamically generate WordPress drafts and publish connector pages to the website
We’ll look at the technical details of the Asana to WordPress flow, the most fundamental part of this solution. This flow transforms web ops tasks in Asana into a dynamically built file that can be imported to WordPress to upload complete draft pages for all new TP connectors.
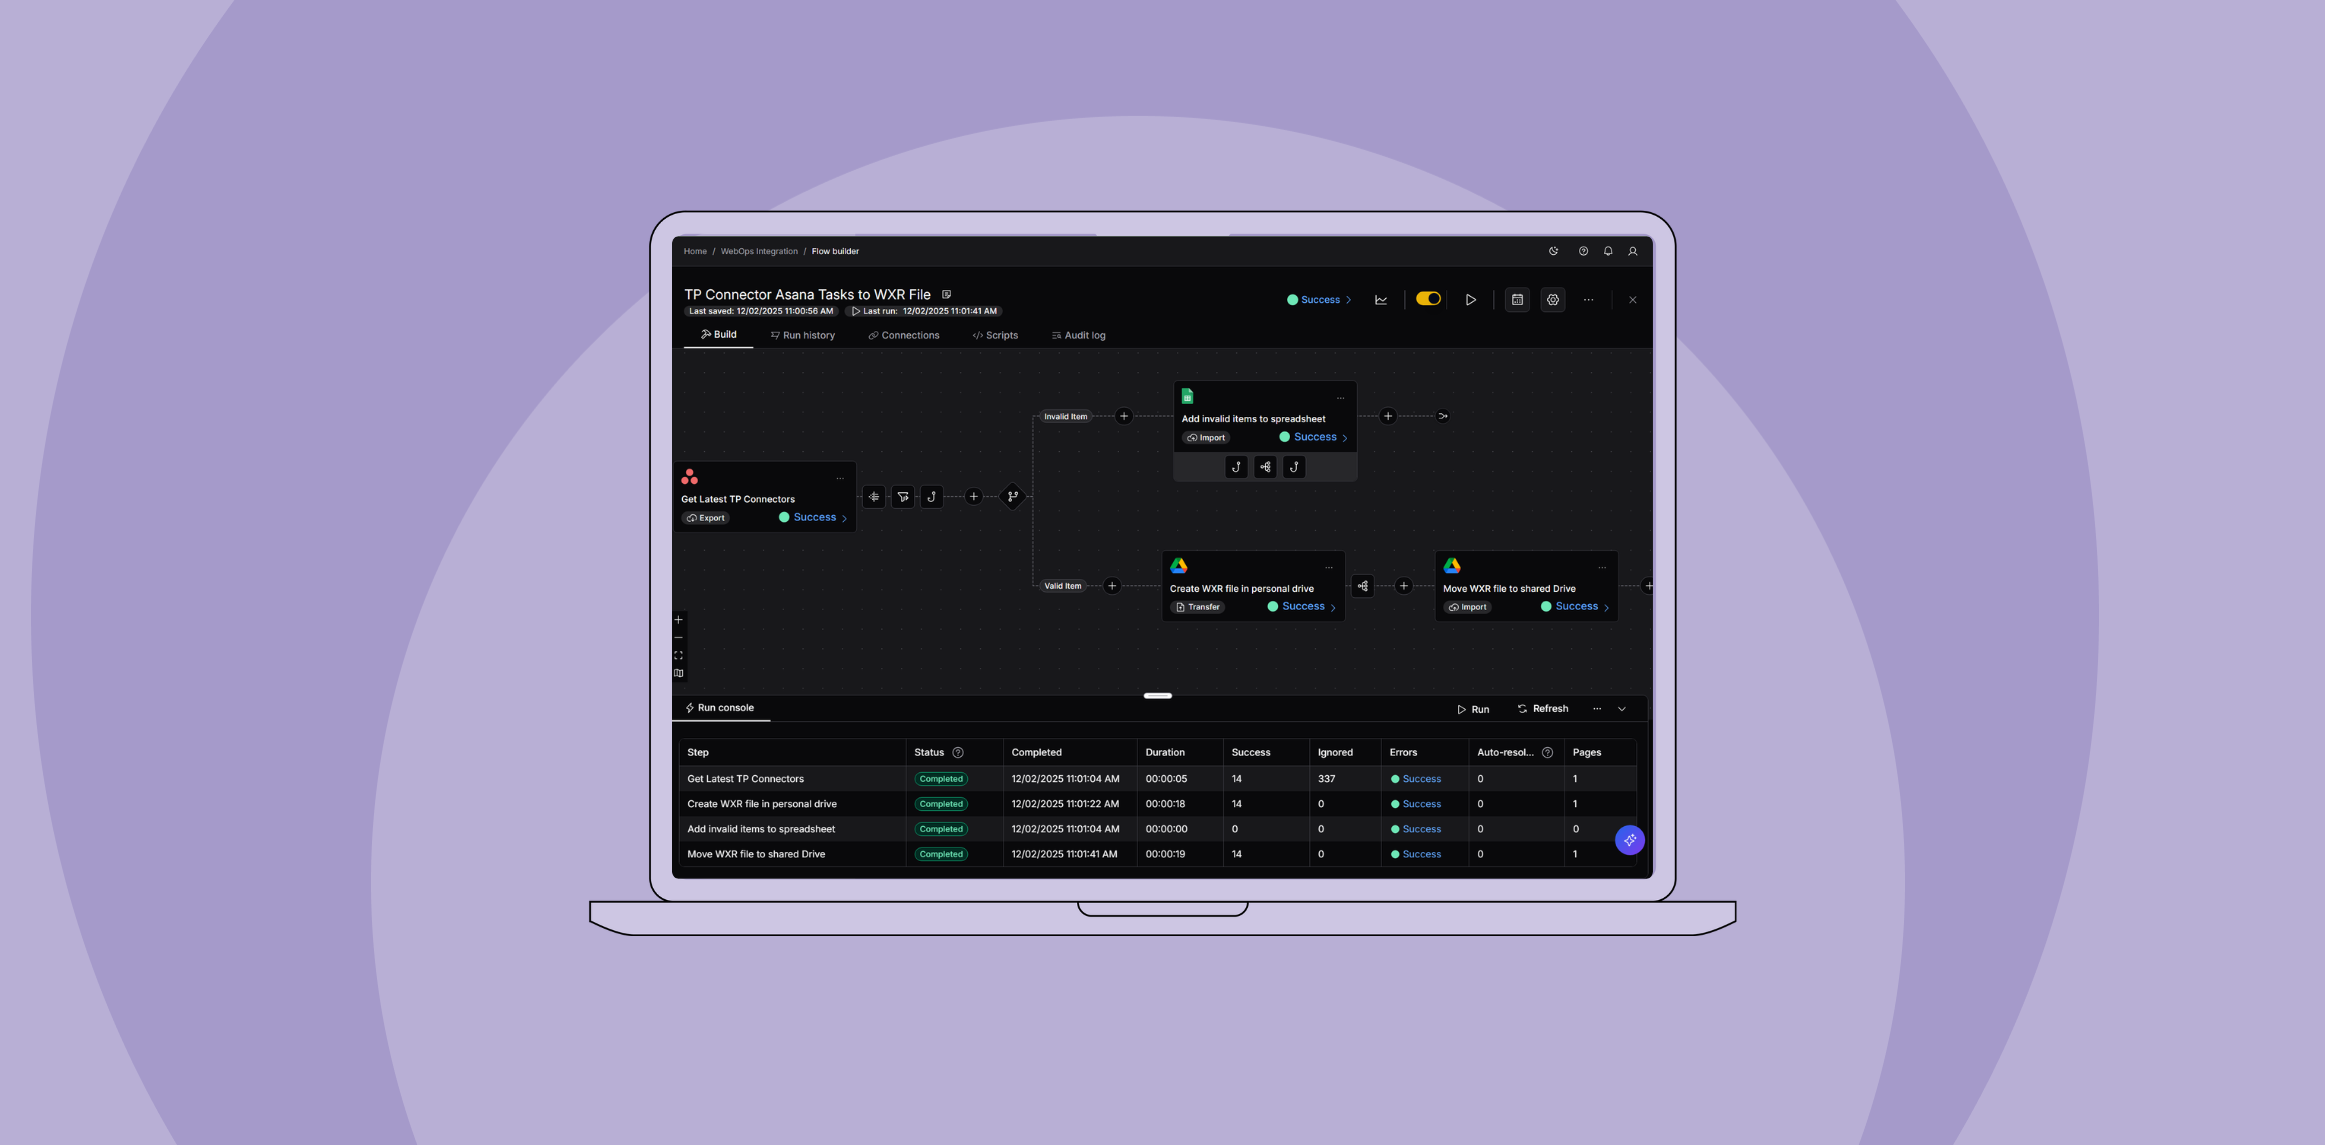
Flow overview
At a high level, here’s how the flow works:
- Export from Asana: Connector tasks (with custom fields like industry vertical and doc types) are pulled directly into the flow.
- Transformation: Nested fields are renamed and exposed for easier use, with defaults applied where data is missing.
- Filtering: Only unpublished connectors move forward; only items with no page need to be added to WordPress. Tasks with a “published” or “staged” status are excluded.
- Hook Logic: Script logic is embedded into a hook to generate WXR <item> tags, using business logic to determine the correct modules to use and dynamically replacing text in a generic WXR template.
- QA Branching: Tasks missing key details are routed to a shared QA spreadsheet for review.
- File Creation (Google Drive Import): Valid items are aggregated into a WXR XML file and stored in Google Drive. This file can then be uploaded to WordPress, creating individual WordPress pages for each task.
Let’s take a closer look at these features of the flow, starting with the initial Asana Export. This flow step will get data on all incoming TP connector tasks from Asana.
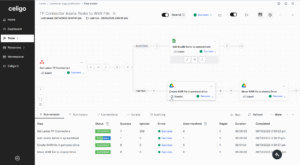
Asana export: Get latest TP connectors

Using opt_fields, the flow retrieves both standard and custom fields for each connector task.
Look at the preview data in the bottom right. Records in integrator.io are grouped in pages that travel through the flow. Each record contains an array called “data”. The items in this “data” array are tasks from Asana that we will use to create Connectors. This seems unintuitive and difficult to navigate for our use case, where each record should be used to create a page.
By setting the “Path to records in HTTP response body” to data, we can resolve this issue. Now, each Asana task becomes its own record in the flow, and each record can correspond to a single page.
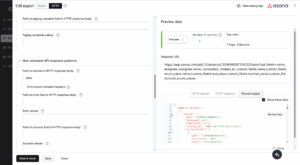
Transformation
![]()
Handlebar helpers use business logic to rename fields and surface custom field values. By going to the settings of each mapping pair, we can set default values (e.g., “Unpublished” or “No Jira ID”) to ensure fields always have a dependable value, even when data is missing.
Output filter

A filter ensures that only TP connector tasks with no previous publication status will be used. “Unpublished” is the default value given to the “pub_status” field in the transformation. Once a connector page is drafted, the TPM team gives it the “Staged” status in Asana and “Published” when it is published to the Integration Marketplace. Blocking tasks with “Staged”,“Published”, or any other status ensures we only create WordPress pages for entirely new Connectors.
Hook
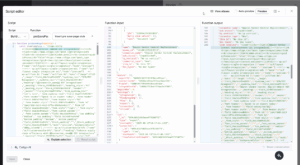
Using this hook, a template for an “item” in WXR syntax is manipulated. Using “@@” delimiters, we dynamically replace parts of this template to create a specialized page. The connector’s name, the EDI category from the TP vertical, the slug, and more are all added or derived using functions.
Other functions in the script include deriving a “nicename” from the connector name and TP vertical (WordPress identifies things like categories using a unique ID-like string called a nicename) and choosing a semi-random background color from a set of acceptable colors to use for the background of the brandmark. This WordPress page excerpt is added to the record. We’ll add this excerpt to the final WXR file. First, we handle invalid pages with a branch.
Valid/invalid item branch: QA with a spreadsheet
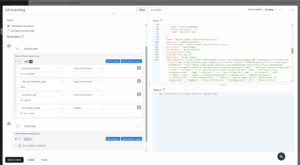
Before creating the final WXR file, the flow runs a QA check. A branch evaluates each connector task to ensure it has the required details. If any of the following are missing, the task is flagged as invalid:
- Industry vertical – needed for proper categorization and module selection.
- Connector type – must be marked “New” (not just an enhancement) to qualify.
- Jira ID – enforces linkage back to the source of truth.
- Doc types – required to configure the correct trading partner module (e.g., X12 or EDIFACT).
Any task missing one or more of these fields is routed to a shared QA spreadsheet, where the TPM team can quickly see what’s incomplete. Only valid tasks continue on to be added as <item> entries in the WXR file.
If the item is valid, it travels to the Valid Item branch, where Google Drive steps are used to construct the WXR file in a shared Drive.
Google Drive imports
The final step is to generate the WXR file that WordPress will use to create draft pages. Because files can’t be created directly in a shared Drive, the process works in two parts:
Creating the WXR file
- File type: The output is XML, since WXR is a WordPress-specific XML format. Using the .xml extension ensures compatibility.
- Directory path: The file is first created in a folder in the flow owner’s personal Drive.
- File name: A dynamic name is generated. Using handlebars, a timestamp is added to keep filenames unique and provide precise logging for re-runs.
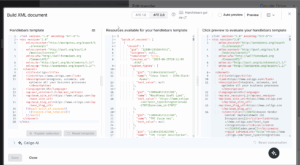
- XML document: The overall DOM-structure of the WXR file is hardcoded, but connector <item> tags are injected dynamically using handlebar helpers. Each Asana task becomes one <item> entry, ensuring that when the file is uploaded to WordPress, it produces complete draft pages for each connector.
A handlebar helper aggregates each record’s item tag into its proper place in the file. When we upload this file to WordPress, it will create complete draft pages for each TP connector.
This will result in a file created in our local Drive, so let’s move this to a shared folder for the entire team to access.
Moving the file
At the end of the last step, we can use response mapping to grab the ID of the new file and add it to the flow. We’ll need this to specify which file needs to be moved.
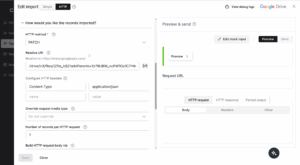
We’ll switch to HTTP configuration for this final step. A PATCH request moves the file from the local Drive to the team’s shared Drive folder. This requires specifying both the old and new parent folder IDs (visible in the folder’s Google Drive URL).
To move a file, the following relative URI:
/drive/v3/files/{{file_id}}?addParents={{new_folder_id}}&removeParents={{old_folder_id}}&supportsAllDrives=trueBy automating file creation, naming, and movement, the flow replaces what used to be a manual, error-prone process. Every release cycle now produces a ready-to-import WXR file with full logging, governance, and team access—cutting connector publishing time from hours per page to minutes per batch.
Wrapping Up
Once the WXR file is uploaded to WordPress by a member of the TPM team, all the new connectors will be published as drafts at once. These drafts will have every aspect of them automatically built out except for the brandmark. Once the TPM team adds these, we can publish the pages.
With the publication of all new pages to the integration marketplace, we close the connector publication process. This integration dramatically reduces the time the TPM team spends publishing large volumes of pages to the Integration Marketplace. By directly tying the data entered in webpages to Jira, the source of truth, the possibility of manual entry error is eliminated.
What was once a task that could consume a week of work or more is now a minor task that one member of the TPM team can complete in a day.
Integration insights
Expand your knowledge on all things integration and automation. Discover expert guidance, tips, and best practices with these resources.