3 Tips to Get Started Integrating with Google Sheets API
 Updated May 11, 2024

Despite the popularity of CRM solutions, the tried-and-true spreadsheet remains a common vehicle for collecting and sharing customer information and order details. Perhaps you’re at a young company that leverages low-cost Google Workspace tools and stores data in Google Sheets. Or maybe you’re part of a larger, established company that has acquired a web store that doesn’t integrate with your existing solutions. Google Sheets may serve as an interim solution to export and import the data between systems while a larger integration or migration project is underway. Whatever the case may be, Celigo has your Google Sheets integration needs covered.
Ease of access makes Google Sheets a popular approach for immediate data transfer needs. It’s so common that at Celigo we’ve discovered integrations with Google Sheets rank in the top 10 across our customer base. But despite the appeal, integrating with the Google Sheets API requires a few tricks.
I’ve compiled key information from Celigo’s articles on Google Sheets in three tips to help you get started.
Tip 1: Use a Header Row with Unique, Easy-to-Understand Column Titles
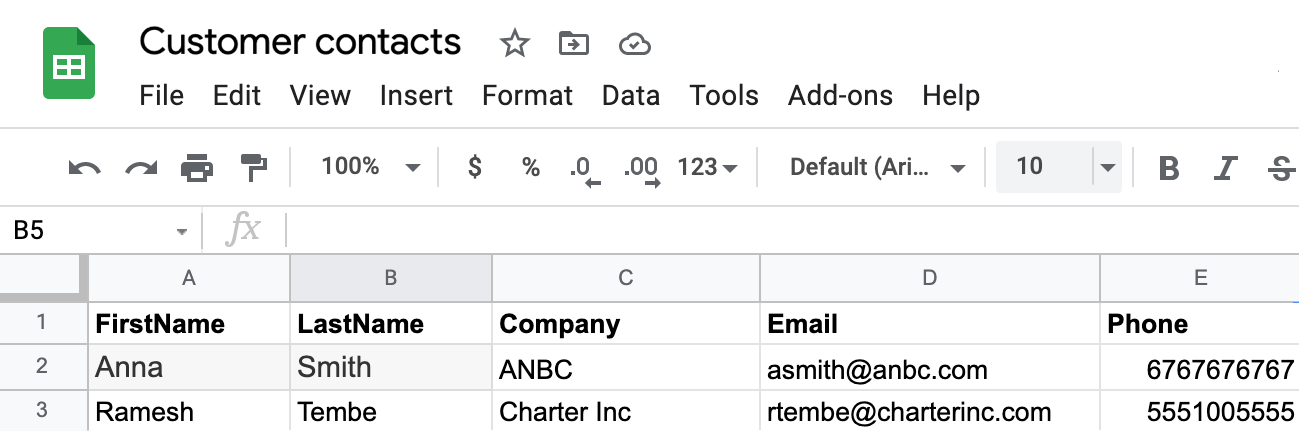
If your spreadsheet doesn’t already include a header row with intuitive column labels, such as Company, you should add this information before you set up an import. This will come in handy when you enter the HTTP request body or map fields.
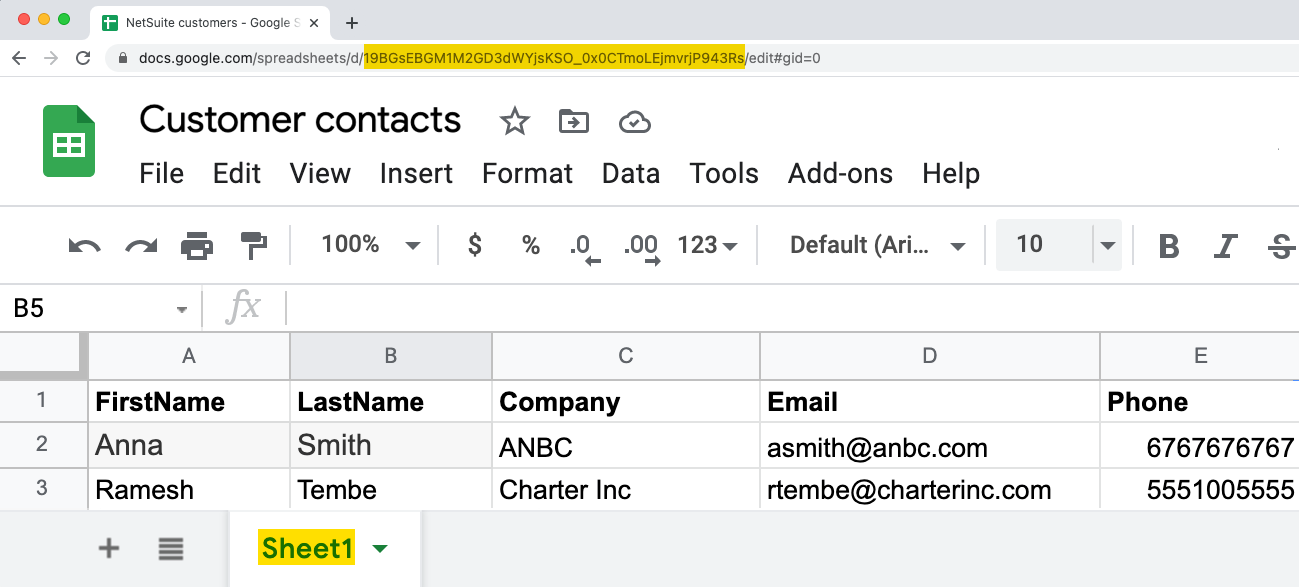
Tip 2: Identify Your Spreadsheet ID and Range
When you configure the Relative URI for an import, you must include the spreadsheet ID and range to pass to the Google Sheets API endpoint. To locate the spreadsheet ID, examine the URL for your spreadsheet. The spreadsheet ID appears between the “/d/” and the “/edit” portions of the URL.
You may be familiar with using ranges in spreadsheets when entering formulas that apply to a block of cells, for example. You’ll need to include a range when you configure the Relative URI, or at least the applicable sheet name (tab) within the spreadsheet file.
The Google API requires one additional parameter called the ValueInputOption, which is typically hardcoded to “RAW”.
For detailed instructions and Relative URI examples, see the following articles:
Tip 3: Leverage Community Resources for Google Sheets
When you’re moving forward with a Google Sheets integration, don’t forget Celigo’s Community is here to help you. Whether you need to import/export Google Sheets data once or as part of a scheduled flow, Celigo provides the platform and resources to help you succeed.
For more guidance on Google Sheets integrations, see our helpdesk documentation, “Working with Google Sheets.”